Call: 02089881662

Does Your Property Need Emergency Lighting?

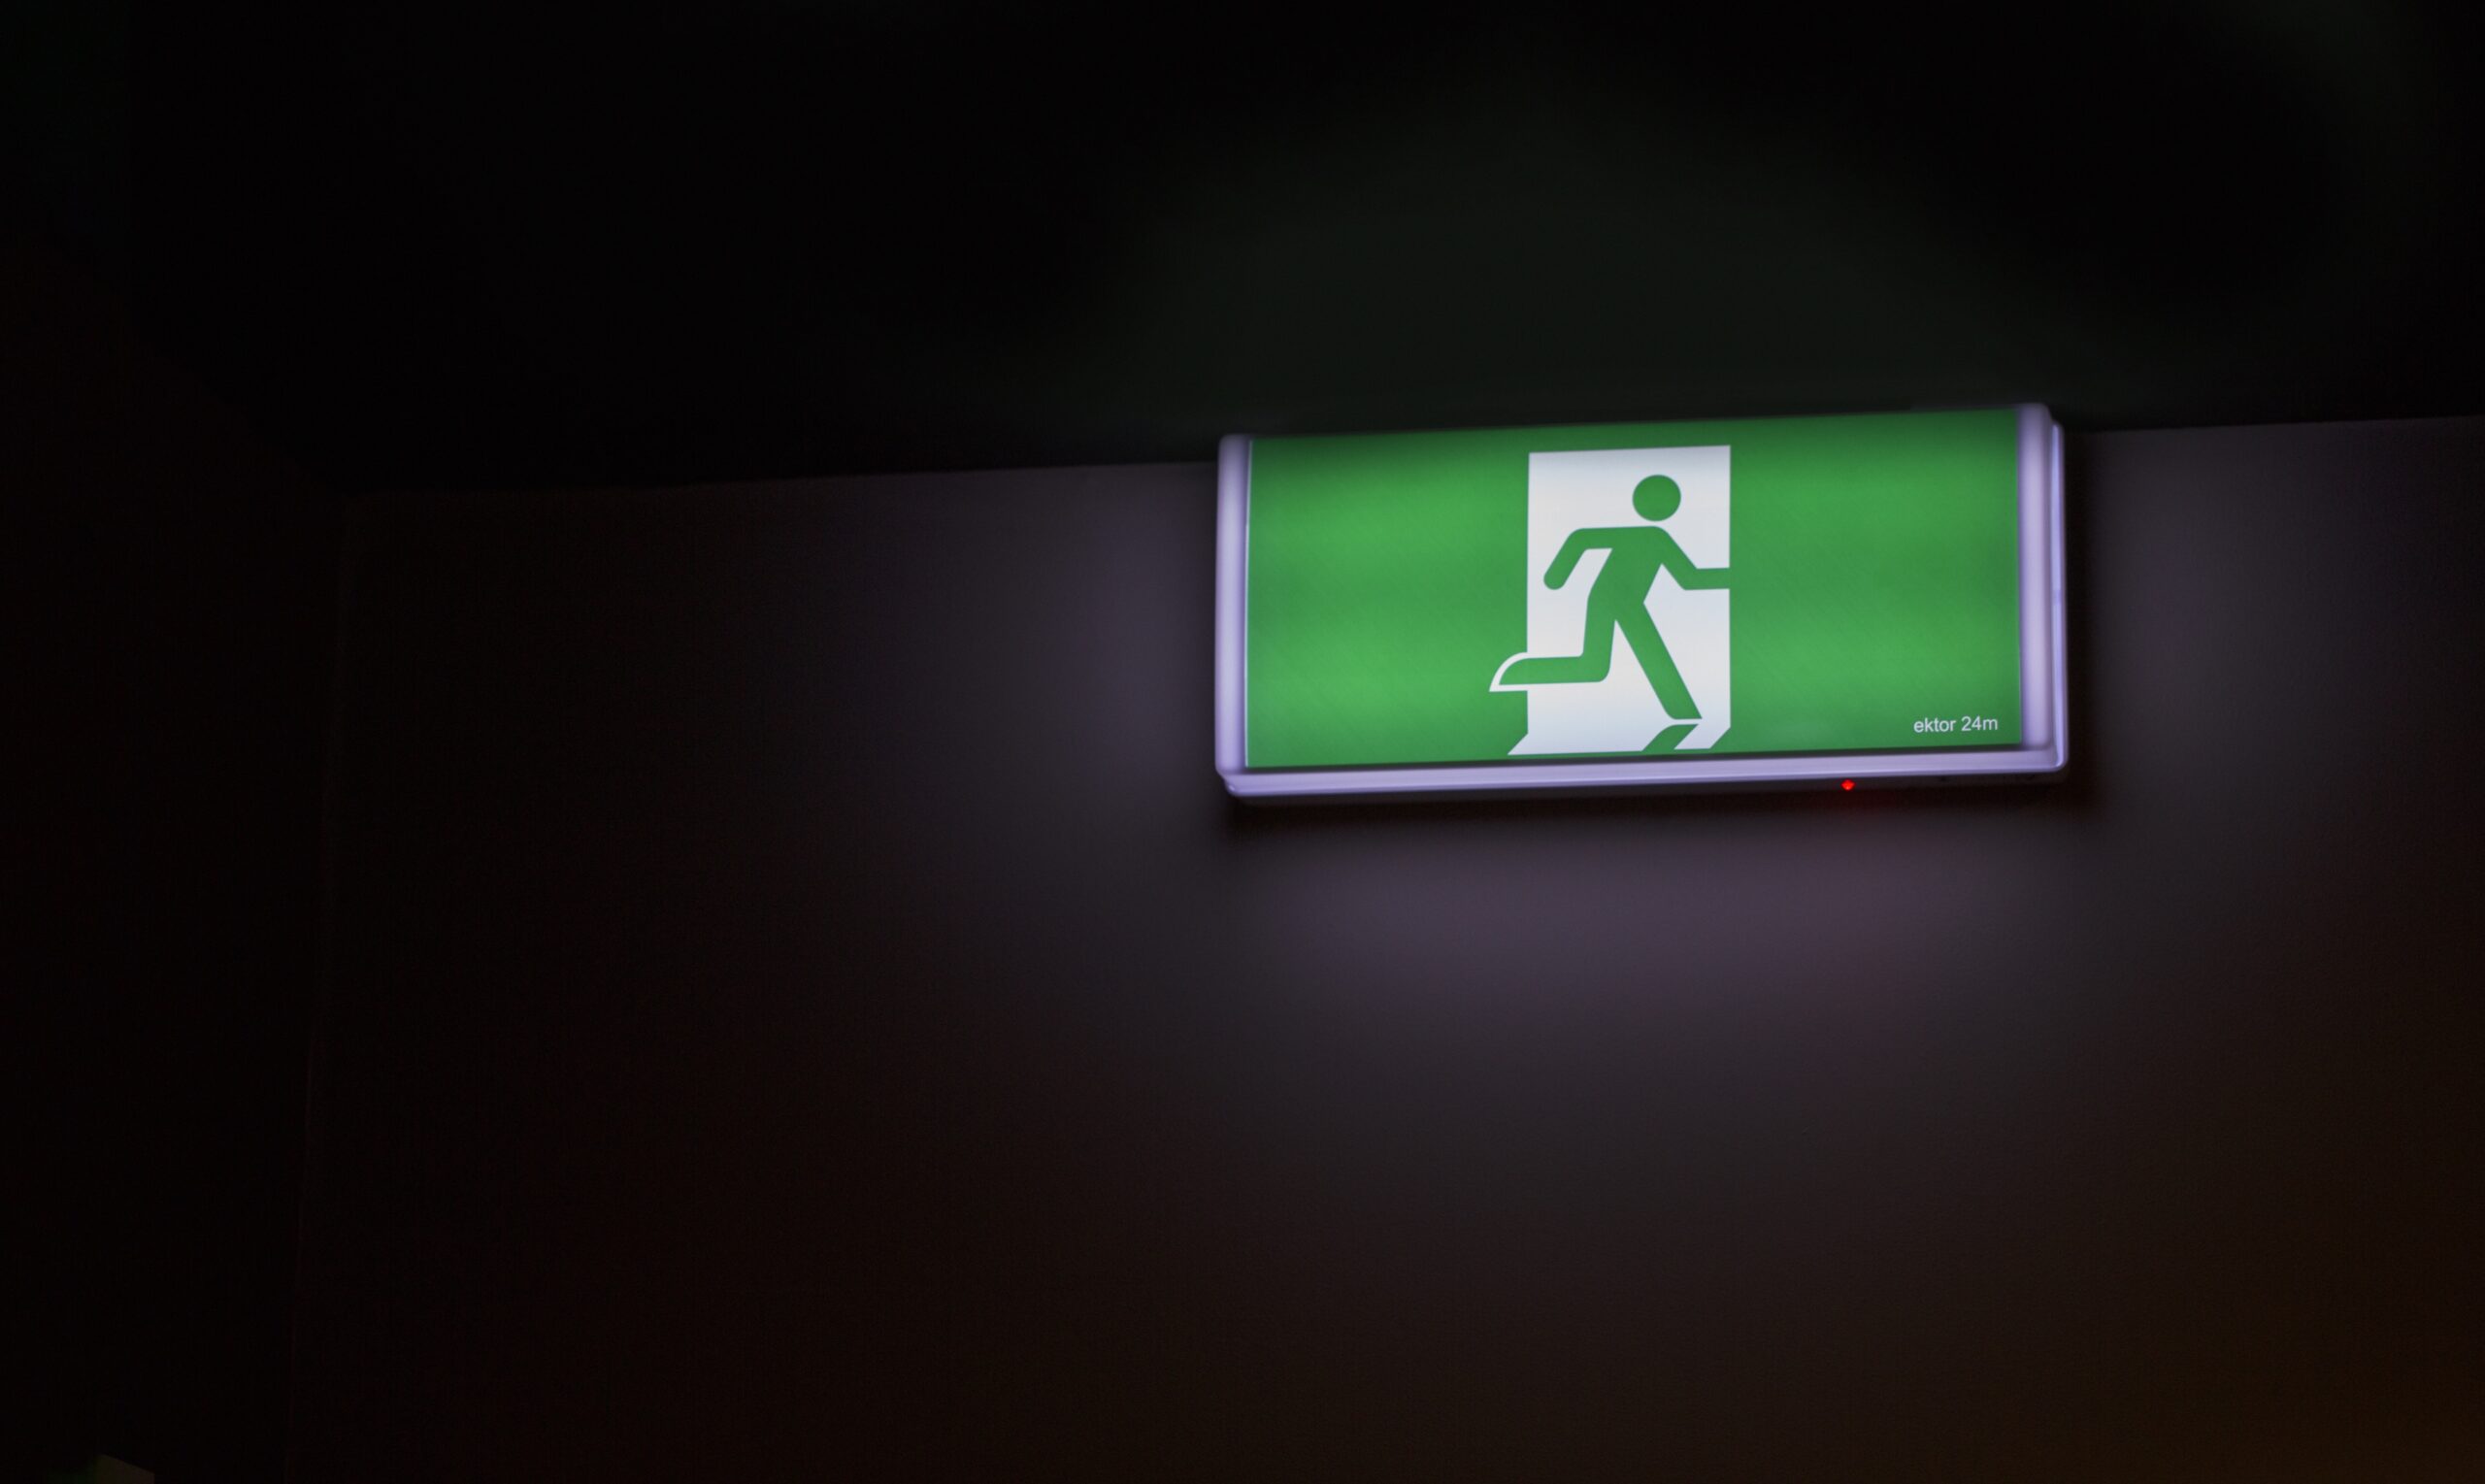
A vital feature of any building’s safety system is emergency lighting. It is a particular type of battery-backed lighting used as the primary light source during a power outage. It also functions when the electricity has been cut off for emergency purposes such as a fire. Emergency lighting is a necessity for any public building, office, or industrial space. It ensures that people will be guided to a safe location clearly when all other lights are out. This is different from standby lighting, which is used to maintain work during a power outage.

The two main kinds of emergency lighting are maintained and non-maintained.

Maintained lighting is wired to the mains electricity so is continuously on. This makes it clear to see at all times, so perfect for buildings where people may be unfamiliar with the surroundings. It then relies on the battery as its primary power source when the electricity is off. This battery is rechargeable and can typically last up to three hours.

Non-maintained emergency lighting only runs on battery power and is activated only during emergencies. These are ideal for offices or buildings where the occupants know the designated exit routes and fire doors. This lighting will only work for the minimum three-hour emergency time frame.


Where Is Emergency Lighting a Requirement?

Any non-domestic property is legally required to provide emergency lighting. This is per government building safety regulations. Those responsible for a building are also responsible for the safety of everyone inside at any given time. It is crucial that a building remains safe to navigate during an emergency or electrical outage, so people can safely evacuate. The Fire Safety Advice Centre stresses that the legal guidelines regarding emergency light installation are the minimum standard requirements for a building. You can choose to go the extra mile by putting an entire lighting system in place.


Which Type Should I Install?

There aren’t any laws stating which buildings must have a particular type of emergency lighting system. However, they are designed with different functions in mind, so some are better suited than others. If you are looking for emergency lighting for a residential environment or hospital setting, you are best opting for a maintained system. There will be times where the main lights may be dimmed or turned off entirely overnight. This makes it beneficial to have constant emergency lighting to be in use at all times, not just during an emergency. In these environments, in particular, occupants can be unfamiliar with the building or become easily disoriented.

A general rule is the more extensive your building, the more lighting you will require. If there are multiple fire exits, all will need to be illuminated in an emergency. It is sufficient to use borrowed lighting if you are in a much smaller building, such as a small retail space. This involves using the light from the street, daylight or streetlamps, to illuminate your property via the windows. In this case, it is vital to have at least one emergency escape light next to the exit of the building.

If you are considering emergency lighting for a school, then the case of whether it is essential or not is a grey area. Due to schools only being occupied during the day and having many windows, they can rely on daylight during power outages. However, the sunlight may not be sufficient during the winter months, and we advise additional emergency lighting. Likewise, if any facilities do not have access to borrowed light, these would most certainly require emergency lighting.


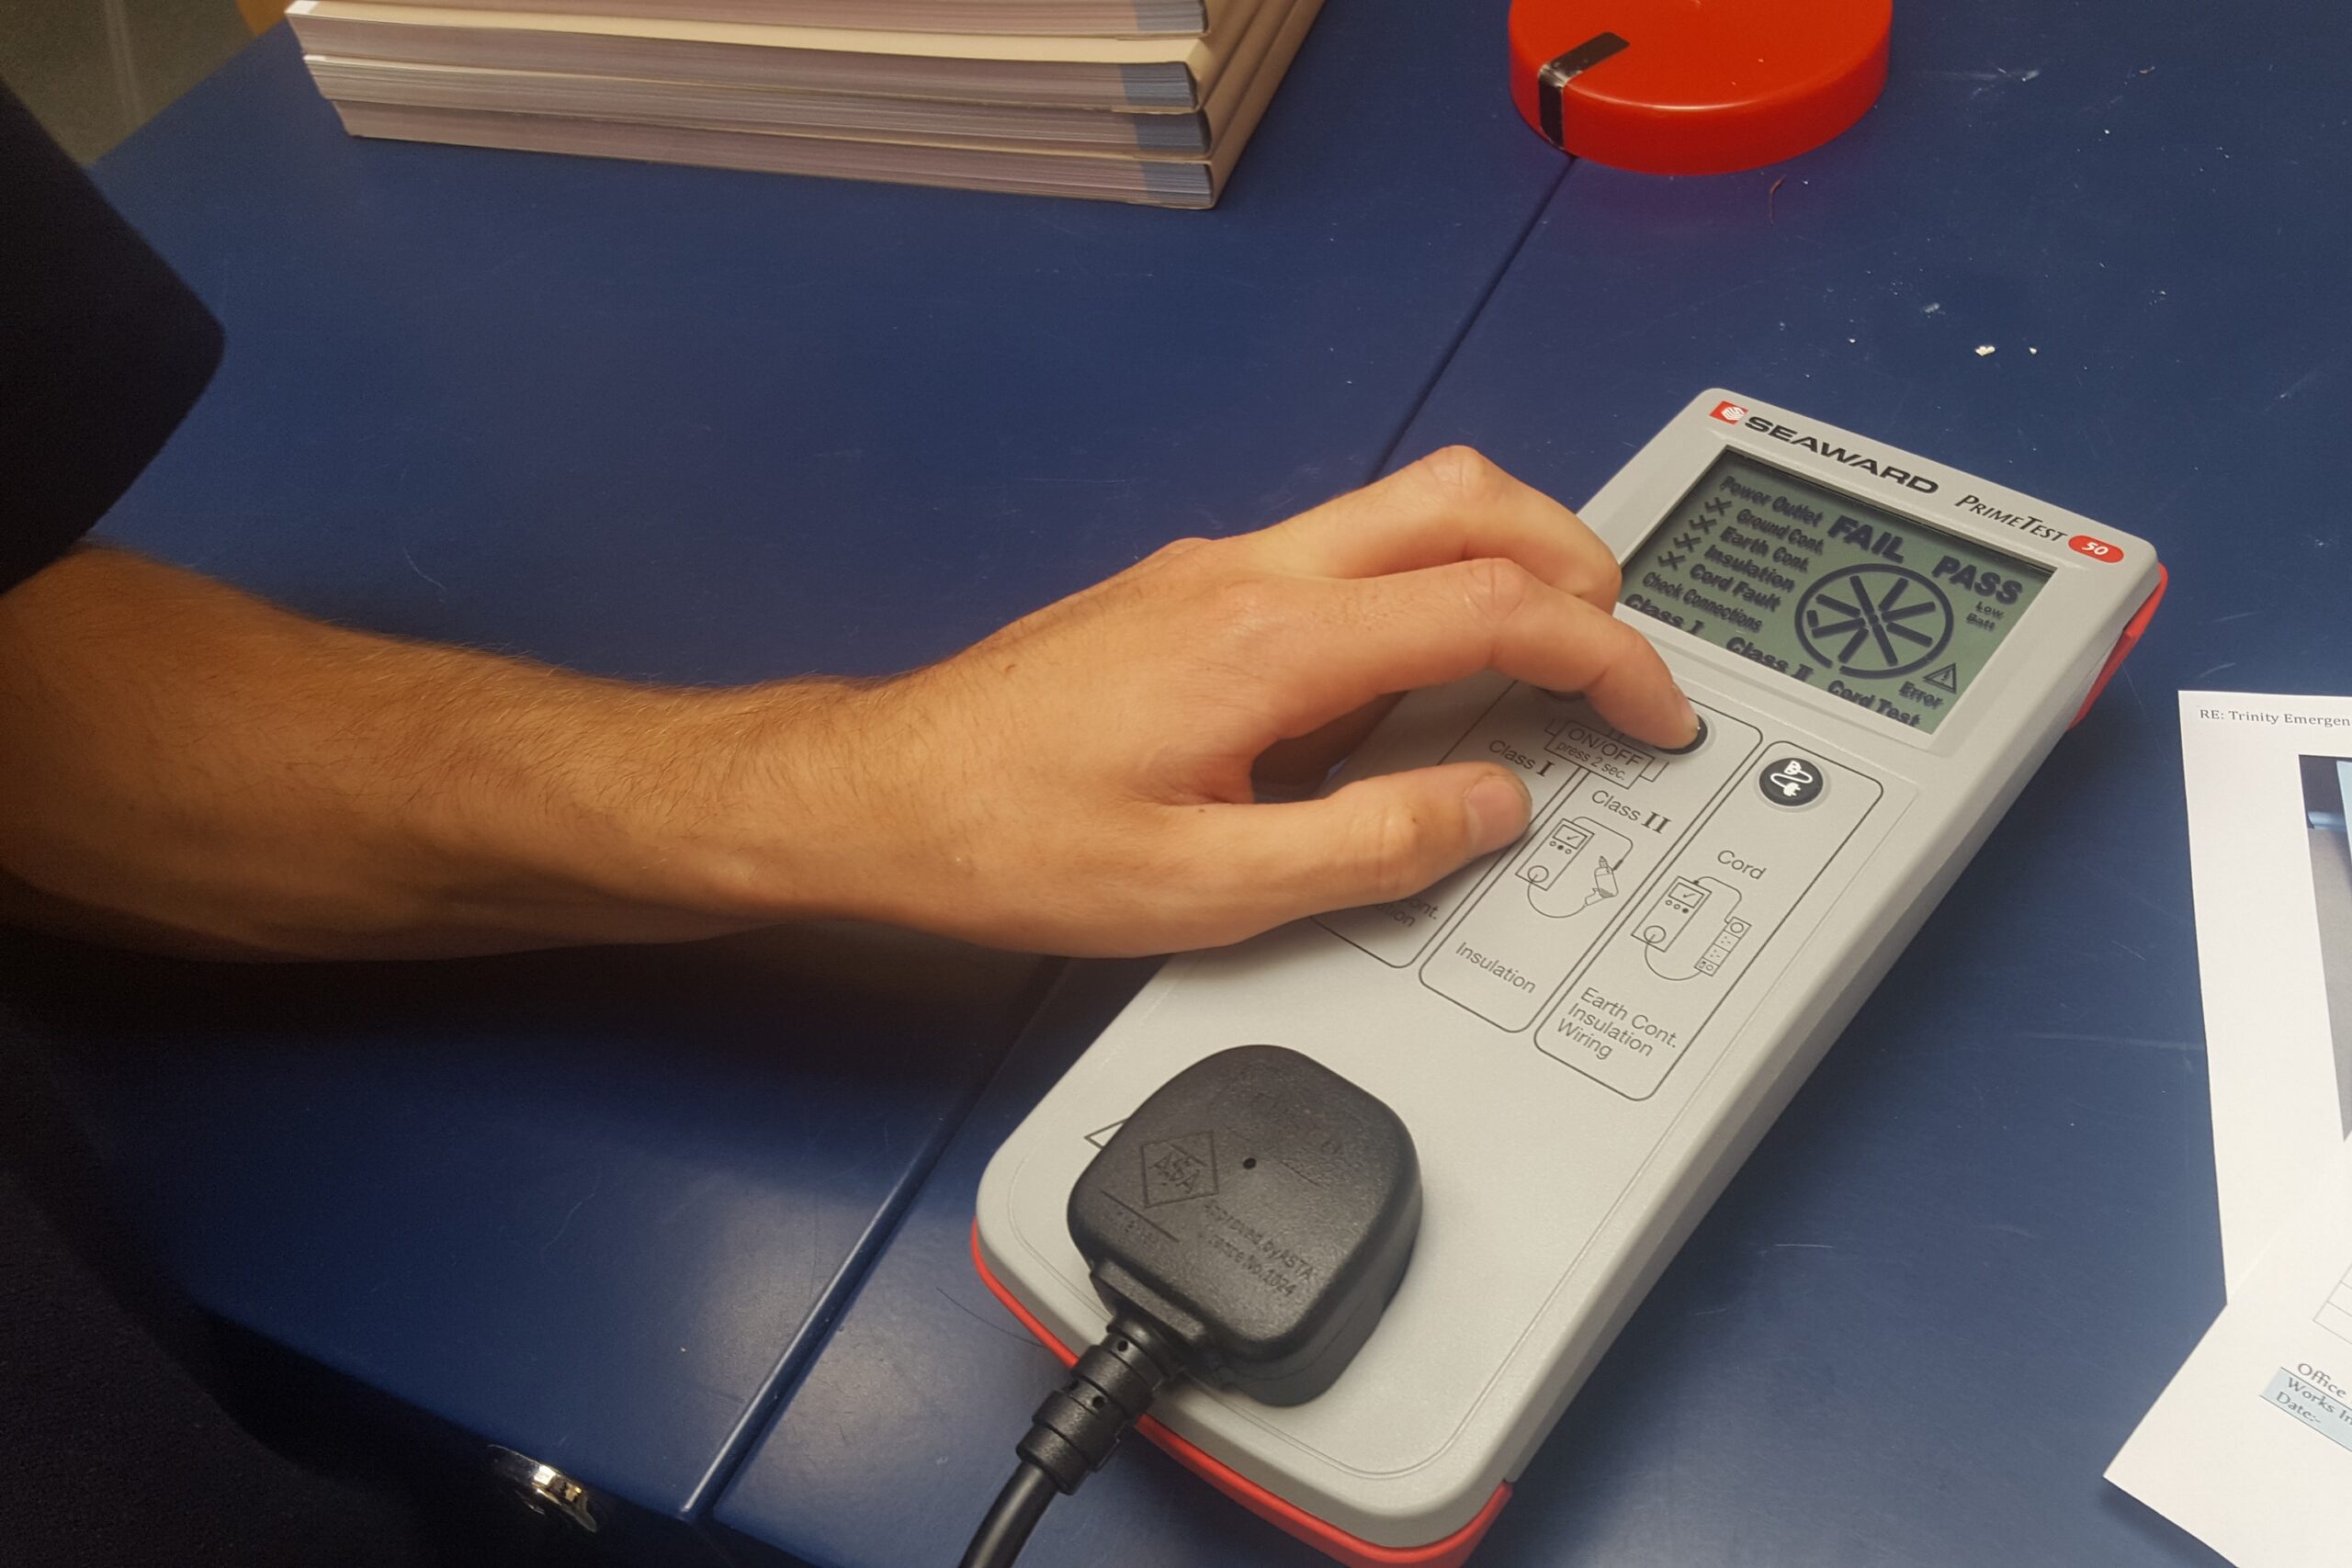
You must ensure that your emergency lighting is installed by a certified electrician specialising in the field. If you are planning for your own building’s emergency lighting, then you can give us a call. Here at Kiasu, we are passionate about your building’s fire safety measures. We have a team of fully trained expert engineers who can design, fit and test any type of emergency lighting system to meet all regulations. No task is too big for us, and we will ensure that all of your fire safety needs are met.

How To Transform Your Kitchen On a Budget

Your kitchen is the most important room in your house. It gets used multiple times a day, making general wear and tear more likely. A complete kitchen renovation is one of the most expensive projects you can undertake in your home. They can cost between £5000 and £14000, so before you take the plunge, it is worth considering some smaller updates you can make instead.

These ideas will help to save you time and money but give you that much-needed refresh.

1. Face-Lift

There are many different ways you can update and upgrade your kitchen without opting for a complete remodel. Take a look at your kitchen and think about what parts are looking tired and need a refresh. By choosing a couple of features to focus on, you can massively limit the cost and time it will take to complete. You will be surprised by the difference a fresh lick of paint or a few new furniture additions can make to the overall look of your kitchen.

2. Colour Scheme

If you have had the same kitchen for many years, it can begin to look dull and fade over time. However, if it functions well for you and your appliances are in good working order, you may just require a bold new paint choice to update the look of your kitchen.

Re-painting walls or kitchen cabinets is a job that is accessible for most people. You will need to set a few hours aside to do it well, but it will be the most cost-effective method. If you lack spare time, you can hire a professional painter-decorator for a small fee. Kiasu offers London-based expert painting and decorating services. Our workforce is efficient, friendly, and professional.

3. Re-Think Your Storage

After years of use, your kitchen has probably accumulated a lot of clutter to fill the cupboards. Holding on to too many things can make you feel as though you are limited on space when perhaps you just need to adjust your storage methods.

It is crucial a kitchen remains practical and having a few too many pots and pans or ingredients you have used once can quickly eat up your space. Think about what you can let go of to free up some extra storage. It is also worth considering what you use most and putting these items in the most accessible place.

4. Tiling

The wall around your kitchen counter can gather food debris, dust, and grease, and although even with regular cleaning, the grout can eventually become dingy. Re-tiling your kitchen walls is a relatively cheap update you can make. Styles change often, and re-tiling can be an effective way to modernise your kitchen.

Tiling is a task you can take on yourself to minimise the fee. However, if you do not fancy the DIY, a professional can tile for a reasonable price. Charged either by square-foot or by hourly rate, the fee for the job will remain relatively low. Kiasu offers a tiling and plastering service for your London property. We can fit any tiles so that they perfectly coordinate with your surrounding features.

5. Features & accessories

Feature walls can be a simple yet effective way of brightening up your kitchen. If you have a kitchen diner, adding a bold wallpaper or exposed brick wall can help separate the dining area from the kitchen. You can also add a bright coloured backsplash around your hob or sink.

Adding accessories to your walls, such as shelving or artwork, can also help liven up your space. Funky prints in bold frames can help create a busier effect and help to bring your kitchen to life. You can also upgrade an appliance, such as your fridge, to make it a stand-out central feature in the room.

6. Light Fittings

One of the simplest ways you can update any space is with alternative light fittings. There are many unique shades and effective filament bulbs that can add a cool feature to your kitchen.

Depending on your budget, you can find plenty of good quality light fixtures on the high street for various prices. Installation is straightforward and quick, meaning you can soon be on your way to a lighter and brighter kitchen.

7. Fix-Up Existing Appliances

Your appliances are the most subject to wear and tear than any other part of your kitchen. While they do have a certain lifespan, you don’t want to waste unnecessary money replacing them before you have to.

By correctly maintaining your kitchen appliances, you can ensure they stay as good as new, saving you a lot of money in the long term.

8. Up-Cycle

Up-cycling has become a massive trend in recent years. By utilising your existing items or finding some great pre-loved pieces, you can reduce your spending and carbon footprint. Updating furniture by sanding, painting, or varnishing can completely alter the effect and bring new life into your home.

Up-cycling projects are fun ways to spend downtime. However, if you are too busy, antique fairs and car boot sales can be an excellent way to find good quality furniture for a fraction of the price. One-of-a-kind vintage items are popular and will add history and character to the room.


We hope this has given you some helpful money-saving ideas to spruce up your kitchen space. By re-thinking the process and getting creative, you can cut costs and end up with a completely new design unique to you. If you have any questions or wish to inquire about your kitchen transformation, call us now on 0208 988 1662.

Your Ultimate Guide to Lower Energy Bills

We all want to save money on our household bills, ensuring your electrics are adequately fitted and repaired can play a huge factor in energy bills.

The average household in the UK spends around £1,254 a year on energy bills, according to Ofgem. That makes energy one of the highest annual costs for UK families. It only makes sense that as we spend so much on energy bills, we should try and bring the cost down while still ensuring our properties are running to the expected standard. So, what can you do to get your energy bills down in residential and commercial properties?


Heating

Heating properties is the biggest culprit for causing our energy bills to skyrocket but is possibly the easiest way to make changes to bring the cost back down.

Turn Down Your Thermostat

We often have our heating on higher than what it needs to be. Try knocking it back 10 degrees, especially when you’re asleep. Doing this for 8 hours could bring your annual bill down by 10%. A smart meter does this for you…

Install a Smart Meter

Smart thermostats enable you to control your heating when you’re away from home via your smartphone. They can make your heating more efficient by only warming the rooms you’re actually using. This is great for landlords of multiple properties. You won’t be paying to heat buildings that aren’t occupied.

They also learn what it takes to heat your home, ensuring the heating is only on at the correct time for the right period. 

Install a New Boiler

You could save a large amount of money in the long run by installing a new boiler. This may seem expensive, but you will save a considerable amount of money over the years on your energy bills. It’s also a great idea to get a boiler service; this ensures your boiler is working efficiently and all of the parts are in good working order.

Check Seals on Windows and Doors

Look at the seals on your fridge and freezer and make sure they are keeping the cold air inside. Do the same for the seals on your windows and doors. You want to ensure that the cold air is staying outside and not passing through your window frames. If seals don’t appear to be working, get them sorted, or your bills will be flying high. 


Water

Hot water is the ‘second-largest energy expense in your home’ studies have shown. Cutting back on your hot water usage can cut a big chunk out of your energy bills.

Don’t Leave Taps Running

Do the dishes in a bowl rather than under a running tap. Cut down the amount of time you spend in the shower and limit the number of baths your household has.

Replace Your Shower

Look for a showerhead with a WaterSense label, which means it is certified to meet efficiency criteria set by the Environmental Protection Agency. Products with this sticker are 20% more efficient than the average product of the same type.

Buy Efficient Appliances

When purchasing a new appliance such as a washer or dryer, go for products with the Energy Star label. Prioritise the appliances you use most and ensure these have the label. A dishwasher with the label can save gallons of water per cycle. Ensuring your appliances are energy efficient is a considerable investment.

Enquire About Discounted Rates

Shop around for your energy supplier. Also, keep in mind that some suppliers offer cheaper rates at certain times of the day, so give them a call and find out if yours do! Using your washing machine in the morning rather than the evening could end up saving you some money.


Power

Lights and electronics make up for the rest of our energy bills – how can we bring that down too?

Turn Off Standby Appliances

You can get plug sockets that can be switched on and off via your mobile phone. This means you can ensure plugs are off when not in use. You can also get timer plugs; these are a cheaper way to schedule appliances to turn off.

There is also an option to install smart power trips, you can plug sockets into this system, and the power will cut off when none of the items is in use. This is an excellent option for business owners, for example, in offices that are often empty for many hours at a time.

Change your lightbulbs

Swap out your light bulbs for those with the Energy Star label. Compact fluorescent or LED bulbs are best for energy saving. These bulbs can be more expensive, so maybe focus on changing the bulbs used most, such as in your business’ reception or your living room.

Install dimmer switches

Dimmers let you decide how strong the lighting is in a room; this is a great way to save money as you won’t be wasting electricity lighting a room fully when it’s not needed.


If you would like some further advice on getting your energy bills down or have any questions, please contact us at Kiasu Workforce. We pride ourselves on delivering 100% of your project requirements 100% of the time.

5 DIY Tiling Tips and Tricks

For the odd repair, calling out a tiler can feel like overkill. If you’re confident that you can handle kitchen and bathroom plastering and tiling for yourself, you may as well replace any dodgy tiles independently. You’ll never have the experience or the prowess of a professional tiler, but with these 5 DIY tiling tips and tricks, you’ll be better equipped to avoid all the biggest headaches that come with handling your own work.

At Kiasu Workforce, we’ve got advice for every single stage of your tiling process. So whether you’re mixing up your grout or you’re adding your final touches and refining the finish, here are 5 DIY tiling tips and tricks to make your life easier.


1. Buy More Tiles

Ideally, it would be best if you aimed for ten percent more tiles than you’ve calculated that you need. Any inexperienced tiler may buy a couple of extra tiles with the possibility of mistakes in mind, but sticking to the ten percent rule is a top tip. If you’ve miscalculated how many tiles you needed initially, which is easily done as a novice, your extra tiles cover your back! You can’t always rely on the opportunity of going back and buying more tiles if the need arises because new tiles can be from a different batch with a slight colour difference. Mismatched tiles aren’t attractive!


2. Patience Pays Off

A general rule of thumb for successful DIY and property maintenance is that you’ll see more success when you take your time. The same goes for your tiling; it’s more likely to be successful if you’re patient. When you’re mixing your grout or any tile adhesive, let it stand for ten minutes once you’re done stirring, and all dry chunks will have had time to absorb water before you begin. Equally, if you don’t allow your mortar to set before you grout your tile, it can crack and crumble, meaning that your work can come loose. There’s nothing less amusing than spending hours fitting your tiles to perfection, only for them to slip away.


3. Focus On A Flat Foundation

Any tiling work needs to be completed on a flat foundation, or you’ll have to confront lippage – a gap where tiles protrude over their neighbours. Protruding tiles are more likely to become loose, and they ruin the uniform of your tiling pattern. If your floor or your wall has gaps that you suppose will be detrimental to the finish of your tiling, you ought to plaster or screed over the surface for the flattest foundation to begin work. The less complex your base is, the higher quality your finished work will appear since you won’t need buckets of skill in working around problems to finish the job!


4. Start In The Middle

You may be wondering in what universe you’d ever start your work right in the centre, over moving in from a corner or an edge. With wall and floor tiling, starting from the centre is the most sensible move! Our top tip with wall tiling is to start tiling your grid in the centre of the wall since it’s easier to guarantee your pattern stays symmetrical. While it’s natural to want to follow the traditional route and begin in the corner, that approach is likely to leave you with wonkiness and an imperfect finish by the time your tiles have set. A centre-focused system, even for your floor, also means any half-tiles you may need can go at the end of each row, and they’re going to be of matching size.


5. Get Help When Necessary

This last point may seem counterproductive in a list of tiling DIY tips and tricks, but sometimes the most sensible thing you can do is seek professional help. Know your limits, and contact local tradespeople when you aren’t confident you can finish a job for yourself. Hiring a property maintenance business such as ours at Kiasu Workforce works out cheaper than you ruining and trying to repair a poor DIY job.

4 Property Maintenance Jobs to do Before Selling

Keeping your home in excellent condition means that the process of selling your property should run smoothly. Buyers are often searching for buildings that require few repairs and little attention, so you’re going to receive more interest if you ensure specific property maintenance tasks are completed before viewings. Something as simple as refreshed painting and decorating around your property could spare you the pain of a buyer choosing another house.

If you don’t know where to start, we’re here to help. Here are 4 property maintenance jobs to do before you sell your home.


Repair and Rejuvenate Flooring

A clear insight into the health of your building is your flooring. Whether it be carpet, vinyl or hardwood, your floors need to look clean and well-maintained. Deep clean your carpets before house viewings, mop your hardwood floors and make sure your vinyl isn’t scuffed or damaged! Replacing poor flooring, or having to perform a deep clean before moving in is a task that buyers will want to avoid. Try to make their lives as easy as possible!

If you need to spend a little extra time or money on the repair and rejuvenation of your flooring, it is still a worthwhile investment. You’re likely to find a buyer much quicker with a pristine property, and they won’t be able to drive your price down based on poor maintenance.


Perform Electrical Checks

A sensible step to take before putting your house on the market is checking your electricals! Sockets need to be fully functional and safe, and you’ll benefit from being confident in the safety of your light fittings too. Electrical works should be a priority for you when you’re preparing your property for sale since sockets and lights are so heavily relied on for the functioning of your house. Any glitchy lighting is a red flag for viewers of your property, and unreliable plug sockets are a safety hazard that no buyer would want to volunteer to handle.

The price of an electrician is well worth the peace of mind you’ll feel knowing that your property is electrically sound, and you won’t lose out on buyers over minor faults.


Assess Your Roof & Drainage

The exterior of your property is equally as important as the interior. If your roof is missing tiles, and your gutters are stuffed full of soggy leaves, you simply aren’t presenting your house in the best light possible. Repairing the tiling of your roof isn’t a job that potential buyers want to be tasked with, and it could make the difference between them choosing your property or another house. 

Consider what will shape the first impression of your building, and focus your property maintenance efforts on those areas. Your roof is one of the first parts of your building that prospective buyers will see before entering the house, so set high expectations with cleanliness.


Fix Drawers and Cabinets

In both your kitchen and bathroom, cabinets and drawers can be a prominent feature of the space and it can be off-putting when they’re in poor condition. A slanted cupboard door could easily make your bathroom look ropey, and squeaky kitchen drawers can be frustrating. Considering fixing them is a minor job, you don’t want to miss out on a sale for poor drawers and cabinets when a handyman could quickly repair them.


For further advice on property maintenance to complete before putting your house on the market, feel free to contact us at Kiasu Workforce.

3 Essential Winter Maintenance Tips

The unpredictable weather that comes alongside winter can be detrimental to the health of your house unless you prepare properly. Darker nights could call for more outdoor lighting to maintain visibility in your garden, and cold weather requires that you closely monitor your exterior water pipes, or turn them off entirely. Blocked drains should be sorted before temperatures drop and the mushy leaves freeze over. un

Snow is beautiful to watch from the comfort of your home, but it becomes nothing but a nuisance if your house isn’t prepared for the change in weather.

With some simple preparation and mindfulness before and during the winter months, your property will thrive all year round. Here are 3 essential winter maintenance tips that should come in useful for your home this season!


Check The Seals

Use a slim tool, like a screwdriver or your finger, to assess the seals around your windows and doors for hidden openings. Any gap in the seal will let cold air pass into your house, which you don’t want. Your heating bills will be costly if you’re trying to warm a property that won’t retain heat properly, so fixing this error will save you money in the long run.

If you find a gap, fill it in with caulk to prevent heat escaping. Even if you have to hire a handyman to do this job for you, it’ll be less costly than overspending on your heating bills and spending winter cold in your home. Also don’t forget to check around the vents of your home for gaps, and keep an eye out where exterior pipes attach to your property. Inspect the exterior of your property to make a note of any potential access points for cold air, and double-check that everything possible is in place to prevent heat escaping.


Service Your Boiler Early

Effective boiler installation, repairs and servicing are all vital to keeping your home happy and healthy, and even more so during winter. Risking your boiler breaking down in winter would be foolish, so make sure to book an inspection and a service before cold weather properly kicks in. You might consider taking out boiler breakdown cover to ease your mind in the expensive build-up to Christmas. 

Though spending money on servicing, inspecting and insuring your boiler may seem daunting, having to arrange a last-minute boiler replacement is almost guaranteed to break the bank more. If the weather is cold enough, your house could be freezing if your boiler malfunctions, and then you’ll have to arrange alternative accommodation too. Pre-empt these issues, and save yourself the hassle.


Assess Your Roof

Winter storms can take a toll on even the smallest faults in your roof. A hidden gap can easily be exploited by freezing temperatures and harsh sleet, and escalate to require a significant and costly repair. The last thing that you’ll want to be burdened with over the winter period is a gigantic roof repair, and particularly since you’ll have to live somewhere else while work is done.

Look out for missing or cracked tiles on your own where possible, but leave any roof repairing or close inspection to professionals. As is a steady theme with all minor repairs before winter, it will be less costly to fix the small error than to wait for the problem to escalate! Replacing broken roof tiles and filling gaps where necessary is quicker, more straightforward and cheaper than a total roof renovation after an incident.


For further advice on how to winter-proof your home, including best practices regarding your heating and gas services, please contact us at Kiasu Workforce. We’d be more than happy to help.

19 Things You Shouldn’t Put Down The Drain (But Probably Do)

Whether it’s down your toilet or your kitchen sink, there are objects and substances that certainly should not be entering your drainage system. There are common culprits that are often discussed in the media, but there are also an array of random things that you may have never even thought about.

There are several reasons why particular objects shouldn’t end up in your drainage system, with the most common result being blocked drains. Having a blocked system can cause several problems for your home or property, such as bad smells, water levels rising and overflowing and even, in the worst case, flooding.

There are also particular objects that should not be put down the sink for environmental reasons and the impact that they have on wildlife. Non-biodegradable objects that are put down the drain often end up in waste landfill or even our lakes and oceans and can be potentially harmful to the environment.

It’s important that we begin to create healthy habits – not only for the good of the planet, but for the health of your own drain at home! Nobody wants to incur an extra cost when they don’t need it and having a blocked drain that needs to be resolved professionally could be one of those costs – if you don’t pay attention to what you put down your drains.

But what exactly shouldn’t you put down the drain? Here’s a list.

19 things that you should avoid flushing…

  • Pasta & Rice – It continues to swell once flushed!
  • Coffee Grounds – Can cause build up long term in the pipes
  • Cooking Oil – This can harden when cool and limit drainage
  • Grease – Including the cooked fat from your meat!
  • Pet Waste – Cat litter included, even if it is advertised as flushable
  • Fruit & Veg Stickers – These are made of plastic and can stick to the sides of drains or filters
  • Condoms – Latex doesn’t disintegrate
  • Sanitary Products – Contains potential harmful bodily fluids
  • Flushable Wipes – Does not disintegrate as well as biodegradable ones
  • Cotton Balls/Rounds/Wool – These don’t break down, clogging your system
  • Cleaning Solutions – Contain harmful ingredients that can be detrimental to wildlife
  • Medicines – Must be disposed of properly
  • Fruit Rinds/Skin – Can clump together and only takes a few to cause a blockage
  • Flour – This coagulates and hardens in drain pipes
  • Egg Shells – They can be ground up and combined with oil to create a thick mess
  • Paint – Regardless of if the base substance (oil, water etc), paint can contain harmful toxins
  • Paper Towels – Toilet paper should be the only product going down your drain
  • Butter & Margarine – Can congeal
  • Motor Oil – Contains harmful substances

Although you may have been aware of most of the items you shouldn’t flush down your drain, we hope you’ve learnt something new! Some of the items may seem silly, or you couldn’t possibly imagine doing it yourself, but these are things that are commonly found to have been flushed.

Are you only flushing what is completely necessary?

DIY: What You Need & When to Call A Professional

Fairly often, when things go wrong in the home (or we just need something doing!), the first thing we consider doing is making an emergency call to someone. Sometimes, it can be a family member who you know is fairly handy, but other times it can be an emergency electrician or plumber, depending on what has gone wrong and how quickly you need it solving! We often panic that we can’t do anything ourselves or perhaps we don’t trust ourselves to try and right the wrong.

Despite this, there are definitely a few repairs and home maintenance things that can be done by yourself, provided you have the right tools and equipment to do so. By having some tools ready and waiting, you’ll know when a repair or task is needed, whether you can grab your kit and do it yourself, or if you need to call in a professional.


Drains

Drains have a habit of getting blocked from time to time. Whether you’ve put something down there that you shouldn’t have, or there’s been a blockage further along, it happens. Two pieces of equipment that can help you unclog a drain yourself are a plunger and a drain snake. Both together and seperately, these tools can assist in getting your drain unclogged and back in working order if the issue is small.

However, there may be occasions where the blocked drain causes damage and inconvenience like flooding, larger blockages on your street or foul odours. This may be the situation where you may have to call for a professional in blocked drains. They will be able to assess the situation and work to resolve the issue(s), leaving your drains clear and clean.


Boilers

Boilers are an aspect of your home/property where you have to be extremely cautious and careful. Issues with boilers and gas pipework can be severely harmful if not looked at by a professional. An issue that we commonly come across involves radiators that aren’t fully warm, affecting heating and costing money. This is something that can be solved at home if the problem isn’t a large one. All that you need is a radiator key to ‘bleed’ your radiators and that may resolve the issue. Some other hands-free solutions that you can perform at home include re-pressurising your boiler and manually resetting it.

There are certainly some instances where boilers need professionals to look at them. Whether you’re looking to replace or install a gas boiler, or you smell gas, ensure that you call a professional – the latter could be extremely dangerous.


Odd Jobs

There are plenty of odd repair and maintenance jobs that you can do around your home. Some may require special tools that you can easily grab from your local DIY store, whilst others may require your typical handyman equipment. Jobs include tiling walls, plastering, replacing lightbulbs or fitting new lights altogether, or simply painting and decorating your property.

The above can certainly be simple jobs you can work on yourself with no real danger (if done properly) but they can, however, be time-consuming and messy if not done properly and with care. Property maintenance isn’t something that everyone loves and wants to get involved in, but luckily there are services out there that can take the hassle from you.


Ensuring that your DIY box is filled up with appropriate tools could save you both time and money in the long run, allowing you to do some jobs that professionals aren’t required for. However, as always, ensure you know of and look out for the warning signs of certain issues that may require a professional to step in.

Here at Kiasu, we have teams of emergency electricians, gas & heating engineers and plumbers to assist should you need it.

Reducing Utility Bills: Top Tips

Our utility bills account for a large portion of our expenditure. This isn’t all bad, however. In fact, it means that by putting some time into this one area we can cut our spending by notable sums. We are not saying that you will be able to buy your dream car just by switching to energy-saver lightbulbs but with a few changes you can cut down your utility bills and save a little bit extra – it all adds up.  


Boiler Maintenance

Your boiler is one of the biggest factors in the cost of your utilities. If you do not carry out the necessary boiler service and repairs, it will run inefficiently requiring more energy to do the same job. More energy equals more money. In other words, if you don’t stay on top of your boiler maintenance you are throwing away cash. Not to mention the costs of repairing your boiler if it breaks down. Read our guide to boiler maintenance for all the tips on keeping it running efficiently (and in turn cutting down your utility bill).


Insulation

When winter comes around, you will naturally see an increase in your use of heating. This increased use comes along with increased energy bills. However, you can mitigate some of this increased use by properly insulating your home. Insulation can help keep your home warmer reducing the need for central heating. Wall and ceiling insulation are important, but you can also insulate your pipes meaning your boiler won’t have to work as hard during the winter. All this insulation adds up and so to do the energy bill savings.


Efficient Use of Appliances

The easiest way to throw away money by needlessly increasing your utility bill is an inefficient use of appliances. Using a dishwasher for just a few dishes is a clear example of this. Similarly, small laundry loads waste both energy and water. Even the temperature of your refrigerator could be costing you money. If you are inefficiently using your refrigerator by having it set too cold you could be wasting energy and adding to your energy bill. Almost all appliances can be used more efficiently. Simply by being cognisant of this when using them you can cut back their energy use and reduce your utility bills. Limit the washing machine to full loads, air dry instead of using the tumble dryer where possible, and only use the dishwasher when it is full and you are well on your way to cutting down your utility bill.


Energy Efficient Appliances

Using your appliances efficiently is a great way to cut down the energy bill but it can seem like an uphill battle if your appliances themselves are inefficient. An appliance’s energy efficiency rating will give you a good idea of its energy consumption. The more efficient an appliance is the less energy it uses. The less energy it uses the lower your utility bill. It seems simple and it is. Merely by owning more energy-efficient appliances, you can start making savings on your utility bills.


Energy Grants

Many people don’t know it but when it comes to energy bills there is often free cash up for grabs. Government grants, for example, could give you money off your energy bills or help you pay for insulation or installing solar panels. Not everyone is eligible for all the available options, but you might find one that you can take advantage of. There are grants from the government and energy suppliers so there are plenty of options to explore. Check out this “Government energy grants for your home” guide from Which for more details.


Our utility bills can often become quite expensive but by following the tips in this guide you can reduce them and start making some savings.

What is Portable Appliance Testing (PAT)?

If you have found yourself asking, “What is PAT Testing?” you have come to the right place. Here at Kiasu Workforce, we are pleased to present a comprehensive guide to PAT testing. Starting with the answer to your burning question.

Portable Appliance Testing (PAT) is the periodic inspection of electrical equipment to identify defects. You’ve probably seen one of those little green stickers on a toaster, kettle, washing machine or tumble dryer. It means the appliance has undergone electrical testing and is safe to use. These stickers are commonplace in our day-to-day lives and ensure the public’s safety while using electrical appliances.

But sometimes, knowing the definition of PAT testing is not enough, so here is some more information to ensure you’re fully informed on the importance of PAT testing. 


Is PAT Testing a legal requirement?

By law, electrical appliances in business premises must be safe for use (as per the HSE’s Electricity at Work Regulations 1989). PAT testing allows businesses to comply with this legal requirement. 

There is no legal requirement to carry out PAT inspections at home. Still, it’s always worth keeping electrical safety in mind.

There are seven categories of appliances that should be considered for PAT testing:

  • Fixed equipment
  • Stationary equipment
  • IT equipment
  • Moveable appliances
  • Portable appliances
  • Cables & chargers
  • Handheld appliances


What is the difference between movable and portable appliances?

In this case, “moveable” means something which plugs into a socket and can be unplugged and moved around easily. “Portable” means something designed for use on the go.


Traditional vs visual examination methods

Most defects can be found through visual examination methods, but some types can only be found by testing. Visual examinations are still necessary because some types of electrical safety defects can’t be detected through traditional testing methods.

Visual inspection and testing by a competent person may be required, depending upon the type of equipment and the environment in which it is used.


How frequently do I need to test my electrical appliances?

Most people do not know how often PAT Testing should be done. Some appliances must be tested more often, such as well-used, often knocked or easily damaged appliances. It is recommended that risk assessments are carried out regularly to determine how frequently each appliance should be tested and the type of test needed.

The frequency of inspection and testing depends upon the type of equipment and the environment it is used in. For example, a power tool used on a construction site should be examined more frequently than a lamp in a hotel bedroom.

A record and labelling can be useful management tools for monitoring and reviewing the effectiveness of the maintenance scheme and for demonstrating that a scheme exists.

New equipment should be supplied in a safe condition and not require a formal portable appliance inspection or test. A simple visual check will verify the item is free of damage.


What are the classes of electrical equipment?

Electrical appliances are generally categorised as classes 1, 2 or 3, with Class 1 being the most dangerous and Class 3 the least dangerous. Class 1 appliances need a full PAT inspection, Class 2 appliances need an insulation test, and Class 3 appliances are safe enough not to require testing. However, a visual test may be carried out.


Class 1 Appliances

This type of electrical equipment has only basic insulation and relies on an earth for protection. Examples include washing machines, tumble dryers, computers, kitchen equipment and extension leads.

Class 2 Appliances

This type of electrical equipment has extra insulation. It doesn’t rely on an earth for protection, which makes it safer. E.g. lawnmowers, televisions, drills, hairdryers and lamps.

Class 3 Appliances

Class 3 appliances, such as laptops, torches and cameras, are the safest class of electrical appliances due to the low voltages involved. Their charging leads may require tests.


How is Portable Appliance Testing carried out?

Many people do not know how to PAT Test. Those carrying out PAT testing do require a level of knowledge and experience. The right equipment is also necessary, as is the ability to understand the test results properly.

Testing required depends on the type of appliance. The electrician must carry out risk assessments to ensure equipment can be tested safely.

Another important consideration in ensuring the user’s safety is the order in which these tests are carried out. The sequence should always be:

  1. Earth continuity test
  2. Insulation resistance test
  3. Protective conductor/touch current test or alternative/substitute leakage test
  4. Functional Check

An insulation test should always come before attempting any tests which involve applying mains power to the equipment under test. It may detect a dangerous insulation failure.

The recommendations given by the IET Code of Practice for In-Service Testing of Electrical Equipment are as follows:

Class I Appliances

  1. Earth continuity test
  2. Insulation resistance test or protective conductor current test, or alternative/substitute leakage test
  3. Functional checks

Class II Appliances

  1. Insulation resistance test or touch current test, or alternative/substitute leakage test
  2. Functional checks 


How Much Does PAT Testing Cost?

The cost of PAT testing depends primarily on the number of electrical items that will need to be tested in the workplace. A PAT Test also needs to be carried out to the highest standard to ensure the safety of people in the workplace, so it can be time-consuming.

Prices can vary based on the number of items being tested and the time this will take, so it is best to enquire and get a personal quote. Contact our expert team today and email us to enquire.


Can I carry out PAT inspections myself?

A “competent person” can legally carry out testing. This person should have adequate knowledge of electricity and experience in electrical work. They need to know how to carry out both the visual inspection and PAT test, plus understand the hazards.

They should also know the precautions to take when PAT testing and be able to decide whether it’s safe for PAT testing to continue.

Suppose you are concerned about the competency required for PAT testing. In that case, you may feel more comfortable contracting a qualified electrician to carry out PAT procedures. This is especially important where multiple items must be PAT tested, or class 1 appliances require testing.


Book PAT Testing Today 

We can help you with a variety of electrical works at Kiasu Workforce, including expert PAT testing in London. 

Our team of qualified and experienced electricians are on hand to ensure capable and competent PAT testing for all appliances on your site.  We can also offer further guidance on appliances that do not pass the PAT test, as well as advise on when PAT testing should be carried out again in line with legal safety compliance. 

Get in touch with our team today to learn more about how we can help you with PAT testing. 


Related

PAT testing explained: Everything you need to know

A complete guide to PAT testing for businesses

Workplace safety: Is your business fully certified?